Sentry Page Protection
The Cue Bank
The Cue Bank gives you specific cues and teaching points to help clients execute the exercises.. Each month, more cues and moves will be added to help your teaching and hopefully give you little tips for Pilates success!

The 100
-
The 100 is all about breath-taking it deeper and fuller. If you find your breath becoming restricted, short or shallow, stop. Begin with 1 breath and progress to 10.
-
Keep the hands higher than the thighs as you pulse this will enhance the connections
-
Reach the top of the head to ceiling, lifting from behind the shoulder blades
-
Only take the legs as low as you feel you can control the level from your centre/powerhouse. Take them too low and you will feel the strain in the neck or low back
-
Keep a soft knee, locking them out will really recruit the front of the hips rather than your centre.
-
Don’t over-point the toes. Focus on where you should feel the work- in the centre
-
As you progress, lower the legs. The ultimate level is where the feet are in line with the lines

The Roll Up
-
This move is amazing for feeling the two-way stretch to create space in the body. Reach forwards through the fingers and heels as you pull back through the waist.
-
Don’t be tempted to lift up to a tall position, keep working through the C-curve
-
Watch the feet stay parallel and pointing directly up to the ceiling, especially the little toe!
-
Draw the sit bones to the back of the thighs
-
Feel a sense of heaviness at the back of the pelvis
-
Keep the arms in line with the shoulders
-
Think of the head as a vertebrae and allow it to follow the line of the rest of the spine

The Roll-Over
-
For the Roll-Over, always keep the arms strongly connected to give you a good point of stability to articulate the spine from
-
Lift the pelvis away from the ribcage
-
Only the open the legs to shoulder width
-
Keep the legs as straight as possible
-
Roll over not up!
-
Use your arms to elevate any cervical pressure

The One Leg Circle
-
Only straighten the gesturing leg as far as you can maintain your centre connection-etherise the front of the hip grips like mad!
-
Stability and control come from the ribcage and the supporting leg
-
Strongly flex the supporting foot
-
Circle directly above the hip, so draw that leg back!
-
Be aware of hip hitching- keep both sides of the waist equally long-this is why it is an abdominal exercise!!!

Rolling Back
-
The key to Rolling Back is to keep the body shape as you roll. Look for an even curve through the spine from the tailbone to the crown of the head
-
Do not let the head kick out especially when the client is nervous if the move
-
Keep the heels in as close as possible
-
Keep the feet softly pointed, if you flex them you will not roll smoothly!
-
Keep the hips as flexed as possible
-
Stay strong through the arms
-
As you progress roll quickly and focus on the pause in the balance to emphasis abdominal strength and control.

The One Leg Stretch
-
Keep a strong connection tracking from the spine, to the inner thigh, to the inside knee to inner ankle to keep the leg deeply connected and aligned.
-
Keep the tailbone lifted and the crown of the head reaching for the ceiling creating space through the spine
-
Send the chin towards the breast bone to keep the weight of the head supported by the powerhouse
-
Lift from behind the shoulder blades
-
Do not let the lengthen leg drop too low as this will drag the tailbone down and lose the lower abdominal connection
-
Pull the thigh into the chest to ensure the colonic stimulation.

The Double Leg Stretch
-
To create great space through the spine when flexing lengthen and lift up from behind the shoulder blades, reaching the crown of the head to the ceiling
-
Keep the tailbone lifted to engage the lower abs
-
Only take the legs as low as you can keep the weight behind the waist, do not let it drop onto the bum
-
As you circle the arms keep them in your peripheral vision, otherwise if they drop behind they will pull down the upper body
-
Only straighten the legs as far as a centre connection is maintain, watch out for gripping into the quads
-
Inhale to extend and fill the body with oxygen, exhale to curl in as small as possible to squeeze out as much air as possible

The Spine Stretch
-
Focus on how the Spine Stretch is a stretch into the spine rather than of the spine
-
Only straight the legs as far as you can hold a lengthened spine. Do not “fight” to hold the legs straight-its not worth it!
-
It is not a hamstring stretch! If you are feeling a hamstring stretch focus on flexing into yourself rather than forwards over the legs
-
Keep the legs strong with the heels pushing away giving a good base of stability to articulate from
-
To really encourage the two-way stretch have the hands on the floor and as they slide forwards pull the navel away in the opposite direction.
-
Imagine you are bringing the crown of the head to the floor in between the thighs
-
Lead with the head on the way down and build the spine back up from the tailbone

The Open Leg Rocker
-
Keep an even C curve through the spine
-
Do not sit up onto the sit bones, stay slightly behind them
-
The subtle push and pull of the arms and legs keep the roll going
-
Inhale as you roll back to expand the back and create space between the vertebrae
-
Do not let the legs go too wide apart
-
Keep the feet pointed, you can’t roll with flexed feet!

The Corkscrew
-
Keep pressure into the arms to support the neck
-
Watch that the toes stay in line to make sure you are truly rotating and not side bending
-
Lift the hips away from the pelvis
-
Keep both sides of the waist long and even
-
When you first twist keep the pelvis level
-
Make sure you arrive on the mat dead centred

The Swan Dive
-
Focus on how this move opens the whole front of the body especially the hips and the shoulders to create space and stretch
-
Starting at the front of the hips, extend upwards to the head and downwards through the legs
-
Choose the leg position with internet and keep that position, do not let the legs drift outwards
-
Make sure the curve through the body is equal, not all in the low back
-
Reach the crown of the head one way and the tail bone in the opposite direction
-
Keep the back line active
-
Keep lengthening out through the spine in both the upward phase and especially the download phase
-
Keep the collar bones wide
-
Keep the back of the neck long

The One Leg Kick
-
To stop sinking into the low back, keep drawing on the arms, as if you are pulling yourself out of a pool, to keep active in the mid and upper back.
-
Ensure you can extend the hip well before adding the kicks
-
Keep the knees together and the thigh bones parallel. Keep the heel kicking directly to the sit bone
-
Only add the foot flicks if you have perfected the traditional move!!
-
Keep focusing on the length through the spine and hips created in Swan Dive
-
Keep the torso still! No bouncing!

The Double Leg Kick
-
Make sure you focus on spinning the arm bones outwards the shoulder to open the chest and maintain good shoulder alignment.
-
As you kick the legs in, the knees can open slightly if needed
-
Keep length through the back of the neck
-
Keeping the hands clasped, lift them upwards as well as backwards
-
Make sure the head stays in line with the rest of the spine and does not hang down

The Neck Pull
-
Do not hang around on the mat-imagine it’s hot and get straight back up again!
-
Draw upwards with the hands on the back of the neck to open it up and feel this mirrored in the low back
-
Press outwards with the legs to help stabilise the pelvis and provide a strong base to move from
-
Flex strongly through the feet

The Scissors
-
Focus on the leg that is moving away from you to really extend the hip
-
Do not allow the other leg to drop too low towards your face-keep the legs equidistant apart
-
Have the elbows as close together as possible and press down into them to help connect across the pelvis

The Bicycle
-
All of the above!
-
As you bend the knee, keep the ankle to knee to hip alignment
-
Try to brush the floor with the lowering leg

Shoulder Bridge
-
Whichever variation you choose stay grounded through the feet/foot and arms to give yourself a strong base to move from
-
Honour the cervical curve-do not jam the chin in
-
Have a sense of spiralling the thigh bones inwards
-
Keep equality through the spinal shape
-
Keep the pelvis quiet
-
Make sure the heels are under the knees
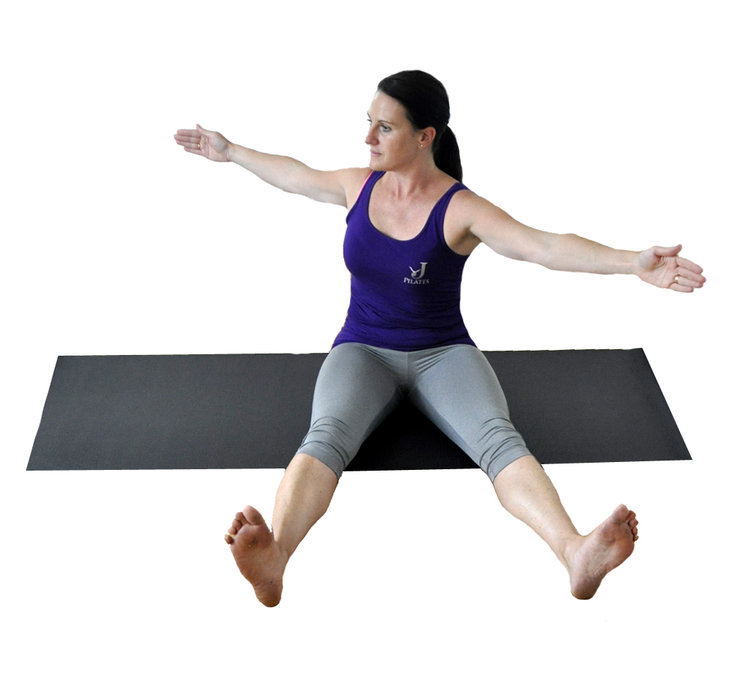
Spine Twist
-
Keep both sides of the waist equally long and lifted as you rotate to wring every last atom of air out before you fully inhale to return
-
Keep the toes pointed to the ceiling and feet flexed
-
Do not let one leg go longer than the other as you twist, this is the pelvis moving not the spine twisting!
-
Easy shoulders & heavy elbows
-
Twist from the bottom rib
-
keep the ribs over the pelvis
-
Spiral the ribs around the spine

The Jackknife
-
It’s all about the back line of the body!
-
Focus on hip, spine and shoulder extension to lift into a strong shape
-
Keep the back of the wrists flat to the floor and arms grounded to alleviate pressure on the neck and keep stability through the shoulder girdle.
-
As you lower keep the legs as vertical as possible
-
Honour the cervical curve- do not let the chin drop into the chest
-
Think of lifting the ribcage off the pelvis
-
Reach long through the fingertips
-
Imagine the legs are being pulled up to the ceiling as you lower to find the two-way stretch.
-
Keep breathing!!!

The Teaser
-
Keep the C-curve! Do not be tempted to grab with the front of the hips and hold the legs up, this will pull you out of the curve
-
Imagine you are sucking the things bones into the hip sockets
-
Only roll down to the navel on the floor and then lift up
-
Reach upwards with the fingertips with the arms parallel to the legs

The Side Kick
-
It’s not just about the lower body! It’s more about what is not moving then what is!
-
Keep the bottom leg strong with a flexed foot, keeping the ankle down
-
Reach the top hip and leg away to keep equality through the sides of the waist
-
If you want to focus on the front of the leg, point through the foot, back of the leg flex the foot
-
Focus on hip extension
-
Keep the ribcage quiet- don’t let it rock and roll!
-
Keep lengthening through the neck to maintain whole body connection and alignment
-
Make sure the leg stays parallel, keep the toes pointing forwards, unless you want to focus on internal/external rotation
-
Keep your gaze forwards

Swimming
-
Really work on the two-way stretch- reach down and up the body from the front of the hips.
-
Do not grip the back of the ankles by over pointing through the foot
-
Focus on the shoulder blades lifting up not forwards
-
Lift the head in line with the arms initially, lift the head higher once equality of extension is achieved
-
Think of this as a reverse 100
-
Keep legs parallel
-
Keep neck long

The Leg-Pull Front
-
To help shoulder alignment and connect into the back, imagine you are slightly spinning the arm bones outwards.
-
Keep head in line by lifting back into the throat if you have a head hanger!
-
Imagine dropping the ceiling, the back of the head & ribcage should touch it
-
Push into the fingers and thumbs to use the forearm to support the wrists
-
Brush foot away first, keeping legs level then kick up slightly-not too high otherwise the back will extend
-
Reach through the crown of head

The Leg-Pull
-
Lift into a long line by hingeing at the hips.
-
Do not curl the tail bone under, keep it heavy
-
Keep the elbow unlocked
-
Keep the collarbone wide, shoulders pointing outwards.
-
Keep the ankles dorsi-flexed to help support behind the knees if needed.
-
Keep the eyeliner forwards, probably to where the ceiling and wall meet.
-
Keep the pelvis level when lifting the leg.
-
As you progress, point through the feet to really feel the length through the front of the body.

The Side Kick Kneeling
-
Make sure the supporting leg stays parallel and doesn’t creep into external rotation to cheat the hip extension
-
Make sure the supporting hip stays extended
-
You need good lateral flexion of the spine in this one so use a block under the hand to help lessen the intensity if needed
-
Try not to rotate
-
Keep the elbow pointing up
-
Fingertips face away from the body
-
Try to keep the supporting leg as vertical as possible

The Side Bend
-
Stand strong through the foot and the arm and let the crown of the head lead the way
-
Don’t over do the reps! Do a few as best you can!
-
This is a one sided bridge!
-
This is a streeeeeetch!
-
Try to keep the elbow unlocked, fingers facing away

The Boomerang
-
Make sure you keep the boomerang shape through the move so you need to start the move by lifting the legs! Not leaning back and losing the C Curve! That’s cheating!!
-
Just go for it! Don’t over think-enjoy the flow
-
Keep squeezing the legs together
-
Let the lift of the arms press the torso forwards

The Seal
-
This is a hip opener! Not a foot clapper!!! It is the thigh bones that open to really stretch the hips
-
Keep the C Curve
-
Press the elbows into the inside of the knees to help the stretch
-
Stay back off the sit bones
-
Bring the soles of the feet together
-
Clap twice!

The Crab
-
This is a roll from the crown of the head to the tailbone!
-
Control is key! You need to pause to change the legs over at the top of the move.
-
Lift upwards off the legs as you roll forwards onto the top of the head
-
Touch the very crown of the head-not the forehead
-
Grasp the toes
-
Stay as tightly curled as possible
-
Elbows wide

Rocking
-
The ultimate front body opener!
-
Do not let your knees go too far apart
-
Grasp the ankles, not just the feet
-
Do not lock the elbows, open from the front of the chest
-
Press the feet back into the hands to lift into the shape
-
Try to extend equally through the hips and spine

The Control Balance
-
This is what we have been working towards this whole time!
-
Keep stretching the leg upwards to the sky
-
Lift the back of the hips as high as possible
-
It’s all about the Control and the Balance!! There is no cheating here!

The Push Up
-
It’s time to return to standing ready for the rest of your day!
-
This is a 3 phase move- roll down, push up, roll back
-
Try to not sway side to side as you walk out
-
Hands are under the shoulders, elbows reach back and brush the sides of the body
-
Keep the whole back line strong- try to keep the head aligned
-
Enjoy each element

